

How to Fill Your Hot Water Heater
Park Model RV Tiny Homes
Two rules protect your home during setup
Open the access panel and inspect the fittings before you connect water
Water line fittings can crack during transport. It is one of the most common issues we see, and a cracked fitting will leak inside the wall where you cannot see it. Catching it before you fill takes five minutes. Finding it after means water inside the wall cavity.
Do not turn on the water heater breaker until the tank is completely full
Powering a dry tank can permanently damage the heating elements. The breaker sits in the main electrical panel, and you will see warning labels there for this exact reason.
Prefer to wait?
Our warranty team can handle this entire process during your setup visit. We carry replacement fittings and can swap a damaged one on the spot. If you would rather not open the panel yourself, leave the water off until we arrive.
Warranty & SupportOpen the access panel
On most Cavco park models, the water heater sits behind a rectangular access panel on the side of the house, opposite the main water inlet.
- The panel is a snug fit, secured with screws. The screw type varies by home, so check before you grab a driver.
- You may need to pry gently with a flat bar. Work slowly to avoid damaging the siding or panel edges.
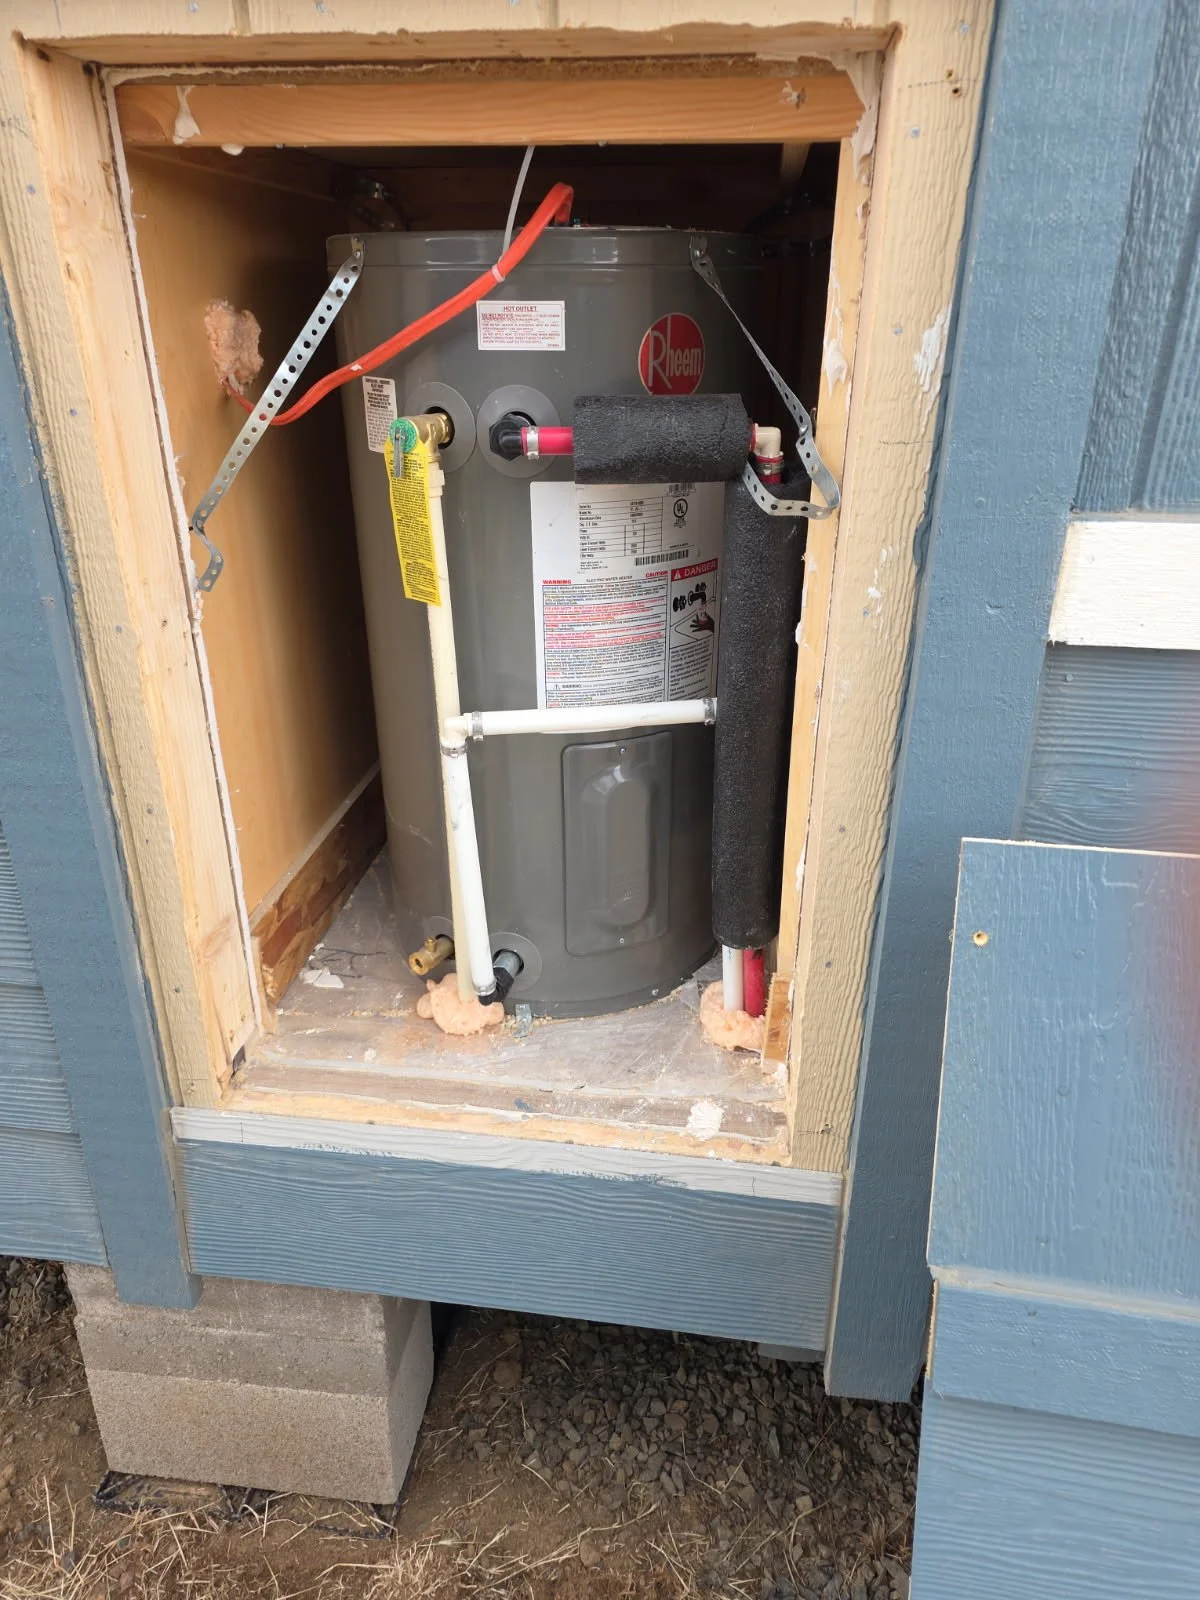
Inspect the fittings
With the panel open, look closely at the fittings on and around the tank:
- Look for cracks, splits, or loose connections on the plastic and metal fittings.
- Check where the water lines meet the tank, top and bottom.
We recommend filling only with this panel open so you can watch for leaks as the system pressurizes.
Step-by-step instructions
Connect the water
- Connect your hose or supply line to the home's main water inlet.
- Turn the water on slowly.
- Keep the access panel open and watch the heater fittings as pressure builds.
Check for leaks
With the water on, inspect these three areas:
- The water heater compartment. Watch the fittings for several minutes. Even a slow drip matters.
- Under the bathroom sink. Check where the water lines screw into the faucet.
- Under the kitchen sink. Check the threaded connections at the shutoff valves and faucet lines.
You are mainly checking screw-in connections. Everything must stay dry before you continue.
Let the system pressurize
- Leave the water on and wait about 10 minutes while the tank fills.
- Glance at the heater compartment during this time. Leaks sometimes appear only under full pressure.
Open a hot faucet
- Go to the bathroom sink.
- Turn the faucet fully to HOT (the red side).
Confirm the tank is full
- Water flowing from the hot side confirms the tank has water in it.
- Once water flows normally, the tank is full.
One hot faucet is enough. You do not need to run the kitchen sink or shower.
Turn on the breaker and monitor
- With hot-side flow confirmed and all fittings dry, turn on the water heater breaker at the electrical panel.
- Watch for up to 5 minutes: the breaker should stay on and the water should begin warming.
Final checklist
- Fittings inspected before filling, and dry under pressure.
- Tank confirmed full before the breaker went on.
- Nothing on the water heater itself needed adjusting during this process.
- Everything dry? Reinstall the access panel.